Update
This post was updated on 1 May 2022
It is possible to install XDebug on Mac for XAMPP without having to install Homebrew, but it’s not a course I’d recommend, unless you want to install the entire Xcode.app package from Apple, and then compile autoconf, automake and libtool yourself. It’s just too much work.
The easiest thing to do is to install Homebrew and the autoconf, automake and libtool packages. This is the minimum required to allow you to compile XDebug. You do not need to install PHP with Homebrew.
1. Install Xcode Command Line Tools
You probably have these installed already if you are using git. But, if not, just run this command from a terminal, and follow the prompts to install the Xcode command line tools:
xcode-select --install
2. Install Homebrew
Install Homebrew if you haven’t installed it already. Instructions here: https://brew.sh/.
Homebrew is a package manager for Mac, similar to Apt on Debian Linux systems, RPM on Redhat type systems, or Yum. It can make installation of some packages, and their dependencies, quite easy.
After installing Homebrew, install the autoconf, automake and libtool pacakges.
brew install autoconf automake libtool
3. Install XAMPP
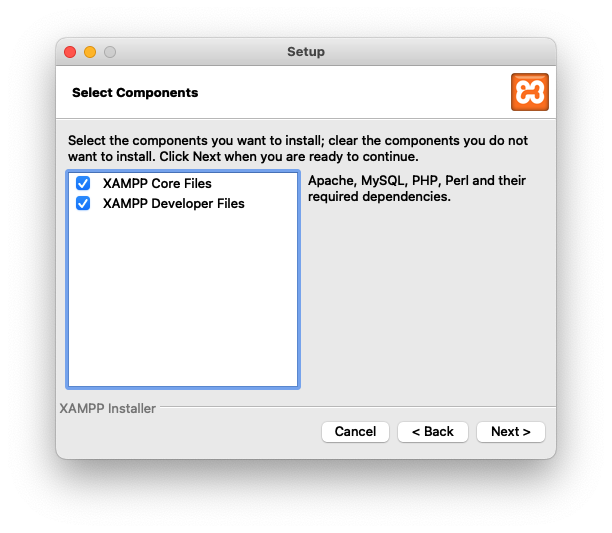
This is the part that may have messed up your XDebug installation attempts before this; you need to install the XAMPP Developer Files along with XAMPP Core Files. This will provide the PHP header files you need to compile XDebug, otherwise, you will receive a very annoying Can't find file php.h and your installation of XDebug will fail. So, make your selections during installation like this:

If you’ve already installed XAMPP without the Developer Files, you will need to re-install, selecting only the Developer Files from Install Wizard options. I haven’t tried this, so don’t know exactly how it will work. Be careful not to lose any of your precious configuration options or web projects in htdocs. A backup may be in order.
After you install the Developer Files, make sure the path to all the XAMPP’s binaries is in your system path:
/Applications/XAMPP/xamppfiles/bin
4. Download and Compile XDebug
Download and compile XDebug. Full instructions here: https://xdebug.org/docs/install#pecl
- Download the source code
- Unpack the
tgzfile - Change directories into the xdebug source folder
- Run the following commands:
phpize

sudo pecl install xdebug
On some M1 systems, you may need to run this instead of the previous command:
arch -x86_64 sudo pecl install xdebug
This will install the XDebug extension in the XAMPP PHP extension folder, which was here on my system:
/Applications/XAMPP/xamppfiles/lib/php/extensions/no-debug-non-zts-20210902/xdebug.so
5. Configure XAMPP to use XDebug
Edit your php.ini file at /Applications/XAMPP/xamppfiles/etc/php.ini. Add the following lines to the bottom of the file:
[xdebug]
zend_extension=/Applications/XAMPP/xamppfiles/lib/php/extensions/no-debug-non-zts-20210902/xdebug.so
xdebug.mode=develop,debug
xdebug.start_with_request=yes
6. Make sure everything worked
Create a file called xdebug_info.php in your htdocs folder and add the following lines:
<?php

xdebug_info();
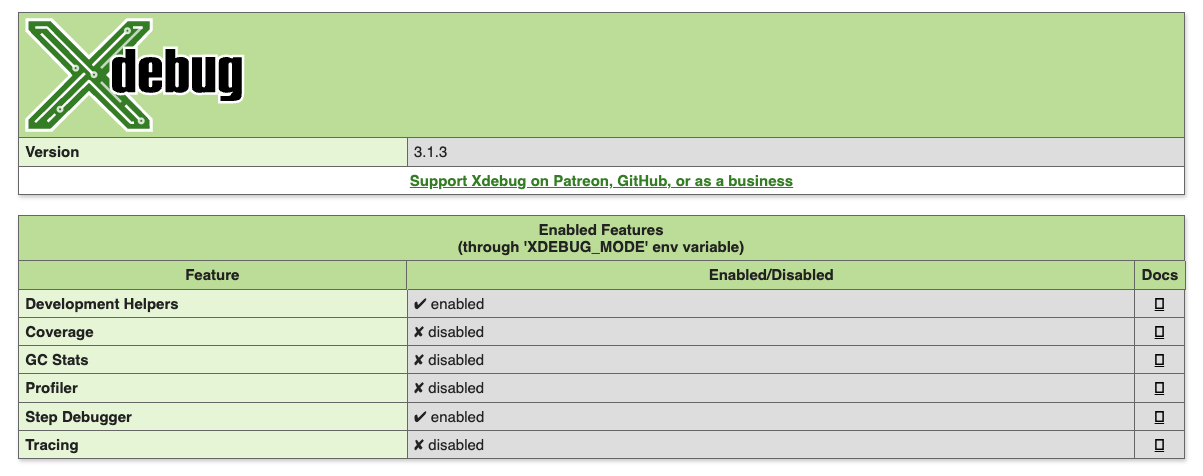
Restart Apache on XAMPP to make sure your new php.ini is loaded, then visit the file in your browser. You should see the following. If not, go back and make sure you did everything correctly.

Congratulations! You just installed XDebug for XAMPP, with a little help from Homebrew.